Battle of Helpmekaar 13-15 May 1900

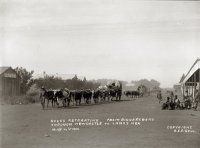
In 1879 Helpmekaar was not even a village. The name Helpmekaar meaning to assist each other comes from the extreme steepness of the route up that section of the Biggarsberg mountains. It required a double span of oxen – 32 instead of 16 to pull a loaded wagon up the mountain – hence helpmekaar.
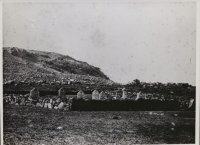
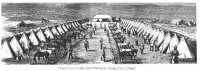
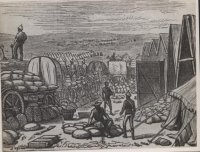
The hamlet consisted of two isolated stone houses and a small chapel some distance away. However, it was the focus of military activity early in 1879. Wagons trains toiled up the heights bringing supplies to the military camp. Three zinc sheds had been erected to hold the reserve stocks of ammunition, biscuits, grain and forage. Tents covered the area and spilled down the hillsides towards Rorkes Drift. Once the sheds were full five thatched huts were erected. A field oven was started which produced fresh bread every other day, despite heavy rain.
A sod fort was constructed, serving as a base for British troop movements. It was to Helpmekaar that the survivors of Isandlwana fled and to where men were taken for burial. It was here that the colours of the 24th Regt were returned to the remnants of the Regiment after being recovered from the Buffalo river. The sheds which had been built here were dismantled and re-erected at Fort Jones, on the outskirts of what became the town of Dundee.
For a few brief weeks Helpmekaar was a name that was known and then it settled back into obscurity for another 20 years.
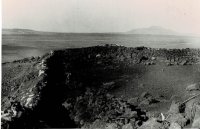
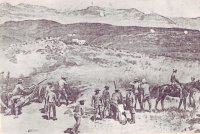
After the relief of Ladysmith at the end of February 1900, the Boer forces took up defences along the line of the Biggarsberg mountains. There were 7000 – 8000 Boers entrenched along the Biggarsberg from Glencoe and Dundee to Helpmekaar. General Buller decided to march from Ladysmith, attack Helpmekaar and so roll up the Boer defences towards Dundee. On top of Helpmekaar hill the Boers had settled in, built a fort and some men had the wives in the area to “cook and clean” for them.
On 7th May 1900, British troops started moving out from Ladysmith. By 10th May, the troops were concentrated at the drift where the Ladysmith/Helpmekaar road crosses the Sunday’s River. Progress was slow owing to the bad road conditions.
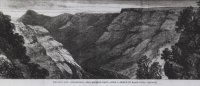
After crossing the Wasbank River, Buller could no longer conceal his movements from the Boers on the top of the Biggarsberg. There were two routes up the Biggarsberg; the narrow Van Tonder’s Pass to Beith (which General Yule had used for the withdrawal to Ladysmith) and the long route around to Helpmekaar. The Boers expected the British to come up the Pass and concentrated their commandoes in this location.
However, Buller chose to attack at Helpmekaar. On the morning of 13th May, the attack began. The Boers realised too late where the British would attack and had to rapidly move men to the nek at Helpmekaar. It became a race to see whether Lord Dundonald and the British troops or the Boers would be the first to reach the nek. The British won by a few minutes – when the Boers arrived they opened fire on the British and halted their advance. More and more British troops came up and joined in the battle and although the Boers clung obstinately to Helpmekaar, they realised that their position was untenable. During the night they slipped away and were seen in full retreat along the road to Dundee.
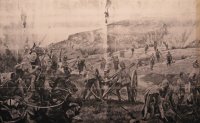
The next morning, the 14th, the British followed them. The Boers set fire to the tall winter grass to delay the British pursuit. A dramatic running fight ensued. The Boer rearguard, the American Irish Brigade, fought heroically, using every rocky outcrop as a sangar. The rearguard action by the Irish Brigade gave the Boer forces time to evacuate the Biggarsberg and Dundee. I love the description by some of the American Irish Brigade of the British soldiers as “having the fat of the bully beef oozing out of their pockets”
On 15th May, the British forces entered Dundee and the town was relieved.
The Boer forces which had occupied the town for 7 months the town left hastily.
Anglo Boer War, Wars and Battles
- Hits: 1936